

Borrowing The Doom Eternal Console
Behind the Scenes: A Hacker's Workshop exploring Doom Eternal's Developer Console.


Introduction
Ever wondered how game modders are abusing your game's preexisting code routines to richen the user's game experience? Allow me to take your hand and let's explore Doom Eternal's Console output.
Why The Console?
The Console, meticulously designed to facilitate real-time information display and seamless input handling, stands as a cornerstone for developers engaged in the intricate process of video game creation and testing. Its command-line interface serves as a powerful tool, allowing developers to manipulate game elements, tweak parameters, and engage in real-time debugging.
This direct line of communication with the game's code is a beacon of flexibility crucial for active development. It empowers developers with the ability to iterate efficiently, conduct rapid feature testing, and swiftly identify and resolve bugs.
Unsurprisingly, these advantages extend seamlessly into the realm of mod development.
In certain games, such as Doom Eternal, limited console access is extended to players, providing a unique and customizable experience for those who enjoy experimenting with game mechanics.
Let's explore
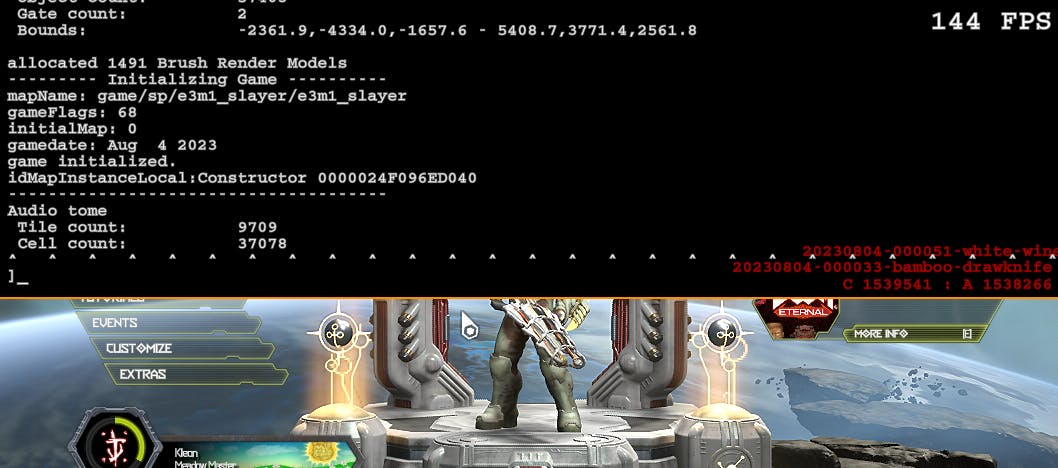
As You can observe, the game is generating a ton of debug information in the console. The most straightforward method to trace the origin of these lines is to dump the game and analyze which function is accessing the format strings.
The key to mastering reverse engineering lies in being an adept developer. An in-depth understanding of all the possible permutations that a console print implementation might take is crucial. As a developer, it would be beneficial to align the syntax for printing with the widely used C Standard Input-Output library <cstdio>, such as the syntax implemented by int printf(const char *format, ...).
In this context, the line responsible for printing the map name in the above screenshot should adhere to the following syntax:
PrintToConsole("mapName: %s", mapNameString);
By searching the binary for a function that accesses the plain text "mapName: %s," you can swiftly and efficiently pinpoint the internal implementation.
But just for the sake of fun, let's take a different approach.
Doom Eternal's Console handles user input as well.

Notice that the user has the ability to input text into the designated field, which indicates the presence of a modifiable buffer. To leverage this opportunity, our first step is to identify the memory address of this buffer.
To accomplish this, we'll proceed by filling up the buffer with a unique string.

We are going to scan the game's memory for this particular sequence of bytes next.


Now that we have our buffer's address we are going to put a breakpoint on it.
Upon pressing 'Enter' while the input field is in focus, the game processes the data within our modified buffer. As the console anticipates a command, the game attempts to find a corresponding entry in its database. As expected, this attempt is destined to fail.
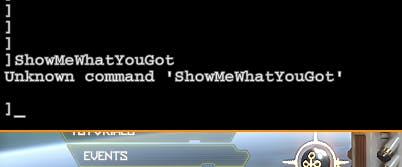
As you can see the console printed ]ShowMeWhatYouGot first in order to log the input buffer, followed by Unknown command 'ShowMeWhatYouGot' to give us the result of the command execution attempt.
Let's take a look at what instructions were accessing our input buffer during this period.

Alright, I get it. It might seem like a bunch of gibberish, but bear with me – it all adds up. By analyzing hit counts and memory addresses, it appears we've pinpointed the sections responsible for rendering, buffer checking, and buffer resetting.
Given that our input is text-based, it's reasonable to assume it's a null-terminated character array. If the buffer size remains constant, the most efficient way to 'clear it' is by setting the first character to 0x00, thus prematurely terminating every string operation.
char buffer[] = "ShowMeWhatYouGot"; // '\0' at the end is implicit
buffer[0] = '\0'; // replace first character with null-terminator
// buffer is now "\0howMeWhatYouGot\0"
The original data remains, but it doesn't impact program functionality. Anything after the null terminator is considered junk data in this context.
Using the x64 architecture, the assembly equivalent of buffer[0] = '\0'; is mov byte ptr [rax], 00. Since buffer clearing logically occurs only once, we're on the lookout for such an instruction with a hit count of 1.
With this knowledge in mind, It's quite obvious we've found the piece we are looking for.

Let's jump right to that instruction and take a look at the function.

Based on the buffer-clearing behavior it's safe to assume this is a string container object. To make it easier to read I'm going to recreate this in high-level code.
void idStr::Empty()
{
    this->pBuffer[0] = '\0';
    this->bufferSize = 0;
}
Now that we know that this is the input buffer-clearing code, let's put a breakpoint on it and inspect the call stack.
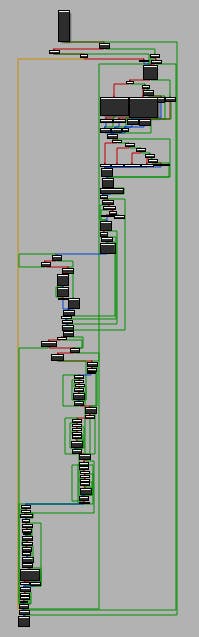
We are looking for the function that calls the buffer-clearing method after printing the original contents to the console. The last caller in the chain looks like this.

It's calling the buffer clearing directly. These lightweight wrappers are expected. Let's go up on the stack once more and take a look at the previous caller.
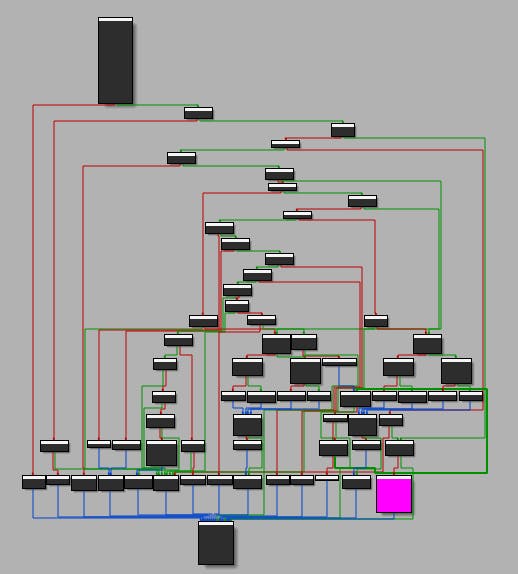
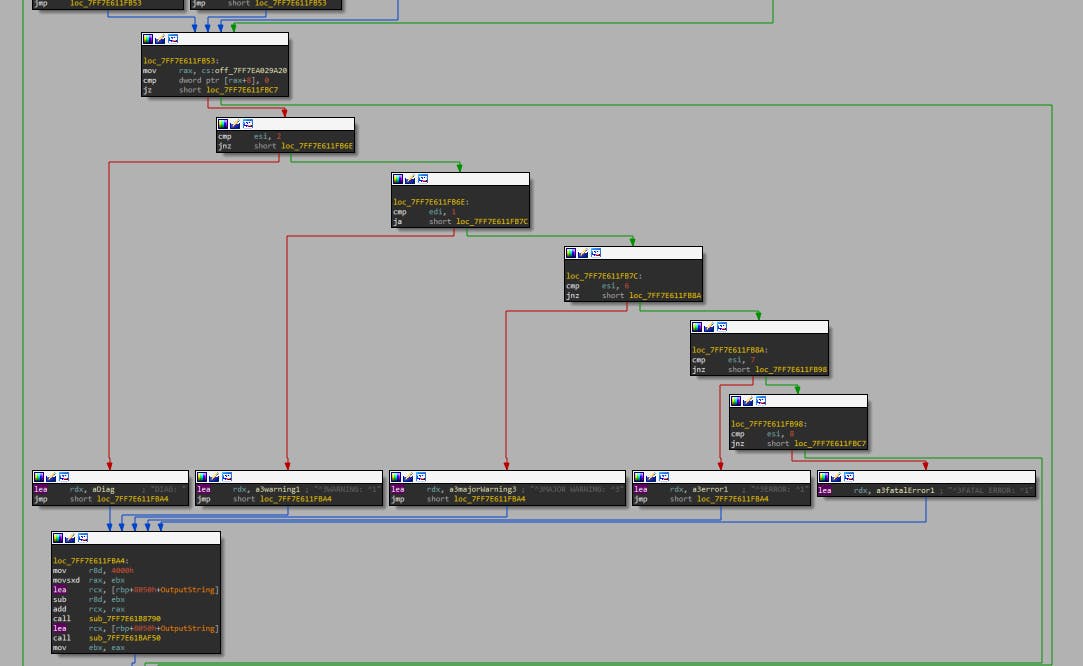
This could be it! Considering the size and branch count, it's worth delving deeper. (I've highlighted the portion that calls our wrapper in pink).
Notably, the (pink) caller code block appears quite late in the procedure, which is promising. We anticipate the console to print the result of the command-checking operations last. Let's examine this closely.

Right at the top we can see the previously mentioned format string.]%s\n looks exactly like when the console printed ]ShowMeWhatYouGot when we've hit enter.
again, the high-level representation of the first call would be:
sub_7FF7E611F240("]%s\n", someData);
Does that look familiar to you?
It's exactly like we predicted - it follows the cstdio formatted print syntax!

It looks like another wrapper forwarding around the full function. Let me show you the possible C representation for this piece of code.
void PrintToConsole(const char* format, ...)
{
    va_list args;
    va_start(args, format);
    PrintToConsole(1, 1, format, args)
    va_end(args);
}
While it's clear at this point that we are going to use this function, still let's take a quick peek at the actual implementation.
That looks promising based on its structure. Taking a better look at it you can notice the part where the first 2 arguments are used. It seems to support different log levels.
We could opt to use the existing log levels through this function instead of the wrapper, but for now, there seems to be no compelling reason to do so. Additionally, take a look at the following string used:

It's intriguing because ^N is an unusual format choice. Let's fire up a game and inspect the console. We'll likely encounter numerous warning messages, and interestingly, they seem to align with the aforementioned text prefix.
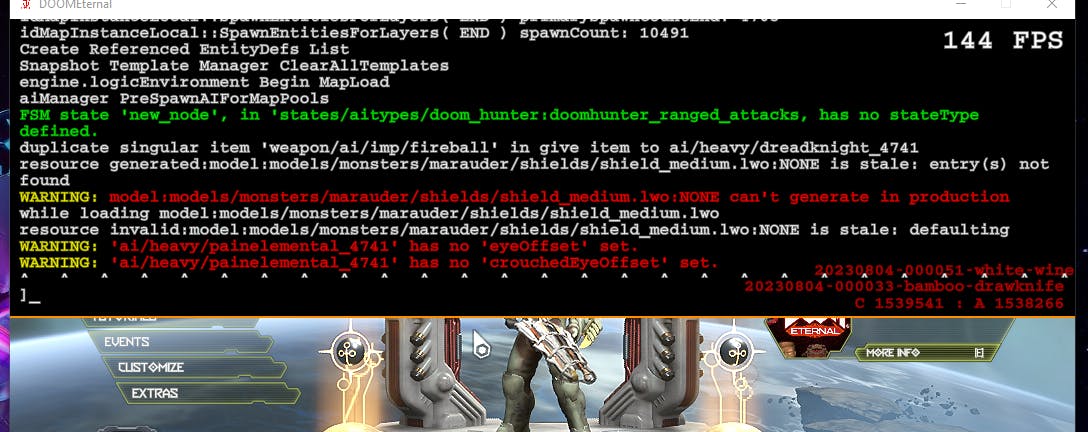
It appears that we've identified the coloring tokens here. When the log is prefixed with the ^3Warning: ^1 text, characters following ^3 appear yellow, while those following ^1 are rendered in red.
Well, the next thing to ask is, can we use this as a user?
Let's type ^3TEST: ^1TEXT into the console.
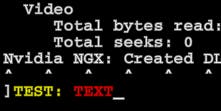
Looks like the console automatically parses these tokens, thus coloring our input text as well.
Let's test the possible color palette via the following test string ^00^11^22^33^44^55^66^77^88^99^1010.
This should be enough to test all the cases of ^N where N can be in the range of 0 and 10 (testing double digits).
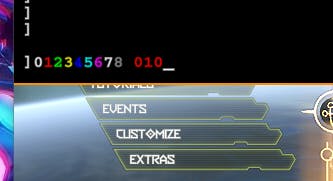
It looks like ^1010 prints 010 in red - that means we can recreate the regex used for the coloring tokens like this: (?:\^([0-9]))?(.*?)(?=\^(?:[0-9])|$)
9 would be invisible since it matches the black background while 0 and 7 are the exact same. In this case, the color palette is the following:

Great! We've gathered enough data to start coding and print to the console!
Time To Start Coding!
Let's revisit the wrapper function since it provides the optimal interface for printing to the console. Now that we've decoded the coloring scheme, we have all the pieces we need.
While recreating the function in C++ based on the Assembly code was an excellent way to unveil what's happening under the hood, it's time to turn that insight into usable code within our projects.
Interacting with the game's code is most efficiently achieved by injecting a DLL, which will contain our C++ code.

By declaring the function prototype of the game's console printing wrapper and then assigning the memory address, we can incorporate it into our DLL's code.
Essentially, we are reversing the roles, turning the game into our runtime function library.
To illustrate, let's print the following string to the console: "^7[^1MySimpleDll^7] ^5EASY WAY TO ^6COMMUNICATE^5 WITH THE ^2USER\n".
While we could use the raw string, the coloring tokens make it challenging to read. For convenience, I'll define these tokens as compiler macros.
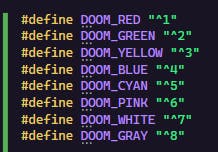
This way we can abuse the string concatenation rules combined with these macros to make the coloring easier to read.

I'll create a wrapper function that not only prints this text to a separately spawned console but also applies the same color scheme as the game. The regex code we crafted earlier will prove useful here.
The final step involves injecting our DLL into the game and inspecting the console. It's showtime!
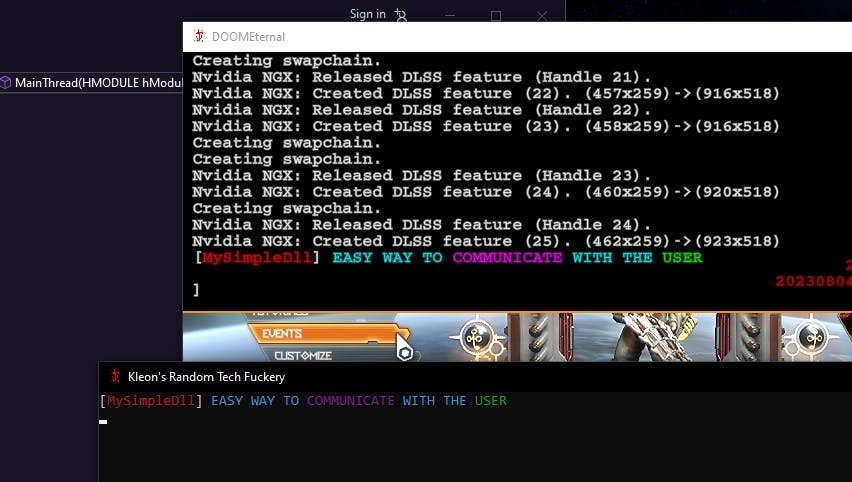
That's all there is to it!
Leveraging existing functions within a game is a cornerstone of modding. Though mastering it requires a robust background in reverse engineering, it becomes a potent tool for modders, allowing them to create interfaces for their communities, streamline development, and deepen their familiarity with the game engine. All of this, while benefiting from the (hopefully) already present safety checks and error-handling methods in said game functions.
I hope this glimpse into a relatively straightforward process has provided valuable insights into the game modders every day.

I sincerely hope that it was an enjoyable read overall and I hope you'll check out my future content as well. I really appreciate Your dedication in reading until the end.
